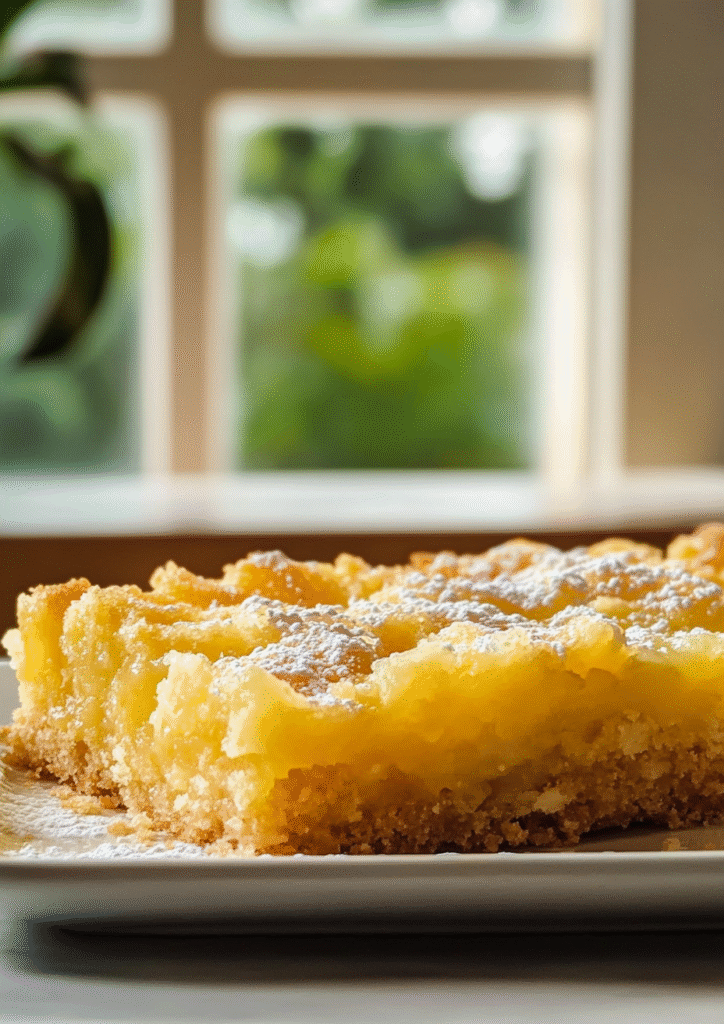
Pineapple Bars are the perfect treat when you’re craving something sweet, sunny, and satisfying. With their buttery crust and bright, fruity topping, they offer the best of both worlds—comforting and refreshing. Whether you’re hosting a summer gathering, prepping snacks for the week, or simply treating yourself, these bars are easy to make, share, and love.
This blog will guide you through everything: from ingredients to storage, baking tips to creative customizations. Whether you’re a seasoned baker or just starting out, you’ll walk away with a recipe that’s reliable, delicious, and sure to impress.
Why You’ll Love This Pineapple Bars
- 🍍 Bright, tropical flavor – Sweet pineapple brings a refreshing twist to every bite.
- 🧈 Rich, buttery crust – Tender and crisp, the perfect base for the juicy topping.
- 🕒 Quick and easy – Simple steps, minimal prep, and pantry staples.
- 🍽️ Great for any occasion – Potlucks, lunchboxes, parties, or just a cozy dessert at home.
- 🌿 Adaptable – Easily made gluten-free, dairy-free, or refined sugar-free with simple swaps.
- 🎁 Perfect for gifting or sharing – Slices cleanly, travels well, and looks homemade in the best way.
- 🔁 Make-ahead friendly – Prepare the pineapple filling in advance or bake the bars a day early.
What You’ll Need
To make these irresistible Pineapple Bars, you only need a handful of basic baking ingredients. Many of them are pantry staples, and the recipe is flexible enough to accommodate dietary needs. Here’s what you’ll need for both the crust and the pineapple filling:
📝 For the Crust:
- 1 cup (2 sticks) unsalted butter, softened
– You can substitute with a neutral oil or plant-based butter for a dairy-free option. - ½ cup granulated sugar
– Provides sweetness and helps create that classic buttery texture. - 2 cups all-purpose flour
– Regular or gluten-free blend will work here. - ¼ teaspoon salt
– Enhances flavor and balances the sweetness.
🍍 For the Pineapple Filling:
- 1 can (20 oz) crushed pineapple in juice, undrained
– If using fresh pineapple, finely chop and include ¼ cup of water or pineapple juice. - ⅔ cup granulated sugar
– Adjust based on your preferred sweetness. - 2 tablespoons cornstarch
– Thickens the filling so it sets nicely atop the crust. - 1 teaspoon lemon juice (optional)
– Enhances the brightness of the pineapple without overpowering it.
🌟 Optional Toppings:
- Powdered sugar, for dusting after baking
- Shredded coconut or chopped nuts, if you’d like to add texture to the topping
These ingredients come together in a beautifully layered dessert—no specialty store runs, no complicated techniques. You can also prep most of them in advance, making this a go-to option for quick weekend baking or spontaneous weeknight treats.

How to Make Pineapple Bars
Making Pineapple Bars is as easy as it is rewarding. The process is divided into two main parts: preparing the crust and making the pineapple filling. Here’s how to bring it all together:
1. Preheat and Prep
- Preheat your oven to 350°F (175°C).
- Line a 9×13-inch baking pan with parchment paper or lightly grease it.
2. Make the Crust
- In a large bowl, cream together 1 cup butter and ½ cup sugar until smooth and fluffy.
- Add 2 cups flour and ¼ teaspoon salt. Mix until crumbly but evenly combined.
- Press the mixture evenly into the bottom of your prepared pan.
- Bake for 15–18 minutes, or until lightly golden at the edges. Set aside to cool slightly.
3. Cook the Pineapple Filling
- In a saucepan over medium heat, combine the crushed pineapple (with juice), ⅔ cup sugar, and 2 tablespoons cornstarch.
- Stir constantly as the mixture comes to a gentle boil. It will thicken and become glossy—this takes about 5–7 minutes.
- Optional: Stir in 1 teaspoon lemon juice for brightness.
- Let the filling cool slightly before spreading over the baked crust.
4. Assemble and Bake
- Pour the pineapple filling evenly over the crust and spread it with a spatula.
- Return the pan to the oven and bake for 20–25 minutes, or until the filling is set and the edges begin to bubble.
- Let the bars cool completely in the pan.
5. Slice and Serve
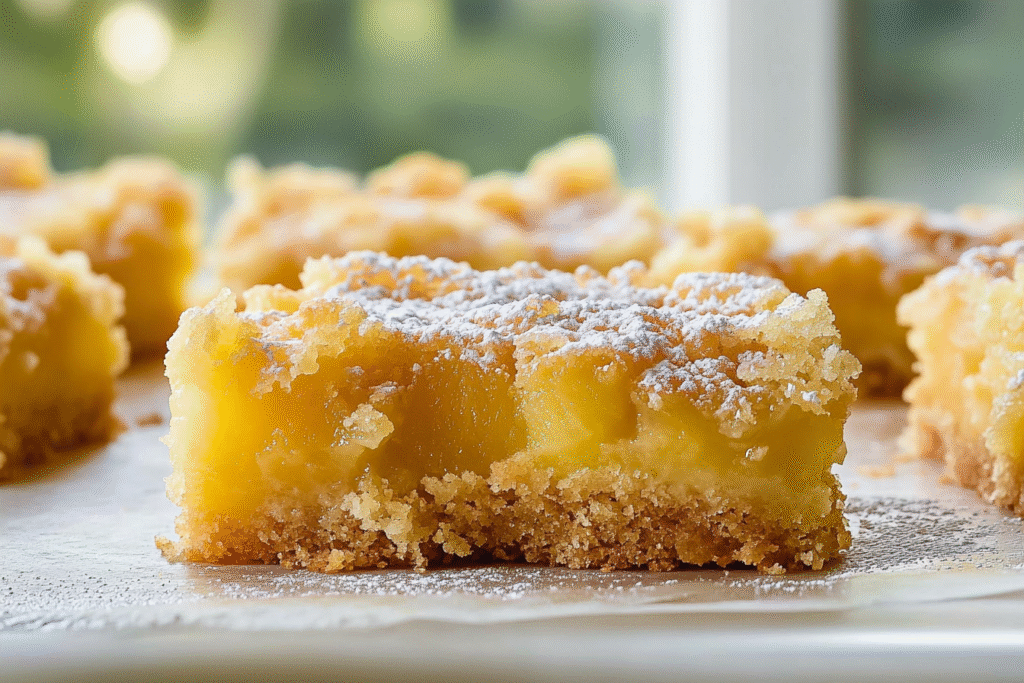
- Once cooled, dust the top with powdered sugar if desired.
- Slice into squares or rectangles. Store leftovers as instructed in the next section.
You Must Know
Before baking your Pineapple Bars, here are key tips to guarantee success:
- Canned vs. Fresh Pineapple: Canned crushed pineapple is easier and more consistent. If using fresh, chop it finely and add extra juice for moisture.
- Cornstarch Tip: Stir constantly when heating the filling to avoid lumps. The mixture should turn glossy and thick.
- Butter Matters: Use softened—not melted—butter for a tender crust. Melted butter can lead to a greasy base.
- Cool Before Cutting: Always let bars cool fully before slicing. Refrigerating helps firm them up for clean cuts.
- Avoid These Mistakes:
- Don’t use pineapple in syrup—too sweet.
- Don’t skip parchment paper—makes removal easier.
- Don’t skip the second bake—it helps the filling set.
These quick notes can help your bars go from good to bakery-worthy!
Perfecting the Cooking Process
Here’s how to get flawless results when baking your Pineapple Bars:
- Preheat Properly: Make sure your oven reaches 350°F before baking to avoid soggy crusts.
- Even Layers: Press the crust evenly into the pan to ensure uniform baking. Use a flat-bottomed glass or cup for smoothness.
- Second Bake is Crucial: After layering the pineapple filling, return the bars to the oven so the topping can set fully.
- Check for Doneness: Look for bubbling edges and a matte center to know the bars are done.
- Cool Completely: Cool in the pan, then chill in the fridge for easier slicing.
- Optional Touch: Dust with powdered sugar before serving for a polished finish.
These little baking upgrades make a big difference.
Add Your Touch
Want to make these Pineapple Bars your own? Try these fun and easy variations:
- Coconut Twist: Add ½ cup shredded coconut to the filling or sprinkle it on top before baking for a tropical touch.
- Spice It Up: Stir ½ teaspoon of ground ginger or cinnamon into the pineapple filling for extra warmth.
- Citrus Boost: Mix in some fresh lemon or lime zest for added brightness and zing.
- Nut Lover’s Version: Add chopped macadamia nuts or almonds to the crust or sprinkle on top before the final bake.
- Make It Vegan: Use plant-based butter and confirm the sugar you use is vegan-certified.
- Gluten-Free Option: Swap the all-purpose flour with a 1:1 gluten-free baking blend for the crust.
These simple tweaks allow you to customize the bars based on what you have or what you love—without sacrificing the delicious base recipe.
Storing & Reheating
Pineapple Bars store beautifully, making them perfect for prepping ahead or enjoying over a few days:
This one’s too good not to try
🧊 Storing:
- Room Temperature: Store in an airtight container for up to 2 days.
- Refrigerator: Keep for up to 5 days. Chill for cleaner slices and a firmer texture.
- Freezer-Friendly: Freeze in layers with parchment paper between bars. Wrap well and store for up to 2 months.
🔁 Reheating:
- From Fridge: Let sit at room temperature for 10–15 minutes before serving.
- From Freezer: Thaw overnight in the fridge or at room temp for a few hours. Avoid microwaving as it softens the crust too much.
Proper storage keeps the texture just right—tender, not soggy—and the flavor as vibrant as day one.
Chef’s Helpful Tips
Pair it with this perfect side
- Line Your Pan: Always use parchment paper—it makes lifting and cutting the bars clean and easy.
- Don’t Overbake: Once the edges bubble and the center looks set, remove from the oven. Overbaking can dry out the filling.
- Smooth Filling: Spread the pineapple evenly to avoid gaps or clumps. Use the back of a spoon or offset spatula.
- For Clean Slices: Chill the bars before cutting, and wipe your knife between each slice.
- Use Quality Pineapple: Whether canned or fresh, choose ripe, juicy pineapple for the best flavor.
- Let It Cool: Rushing the cooling process will lead to a messy texture. Patience pays off!
These tips are the small secrets that lead to bakery-level results at home.

FAQ
Can I use fresh pineapple instead of canned?
Yes! Just chop it finely and add ¼ cup water or pineapple juice. Cook a little longer to soften it.
Is this recipe gluten-free?
It can be! Use a 1:1 gluten-free flour blend for the crust.
Can I make this dairy-free?
Absolutely. Replace butter with plant-based alternatives.
How long do these bars last?
Up to 2 days at room temp, 5 days in the fridge, or 2 months in the freezer.
Can I reduce the sugar?
Yes, reduce by ¼ cup in the filling if you prefer less sweetness.
Can I double the recipe?
Yes, just use a larger baking pan (11×17-inch) and watch baking times closely.
These answers help you adjust and enjoy the recipe however it fits your kitchen.
Conclusion
Pineapple Bars are a delightful blend of sweet, tangy, and buttery flavors that bring a taste of sunshine to any day. With simple ingredients, easy steps, and plenty of room for customization, this dessert fits effortlessly into both casual family moments and special occasions.
Whether you’re baking for a picnic, prepping ahead for the week, or just craving something fruity and fresh, these bars deliver every time. And with tips for storage, swaps, and clean slicing, you’ll find this recipe to be as practical as it is tasty.
Now it’s your turn to give them a try—make them as-is or add your twist. Either way, you’re in for a treat that’s bright, satisfying, and sure to be requested again and again.
The Best Irresistible Pineapple Bars for a Refreshing Tropical Treat
Description
Sweet and tangy pineapple filling sits atop a buttery, tender crust in these easy-to-make bars. Perfect for snacks, picnics, or a refreshing dessert!
Ingredients
Instructions
Preheat oven to 350°F (175°C). Line an 8×8-inch pan with parchment paper.
Mix flour, softened butter, and ⅓ cup sugar until crumbly. Press evenly into the pan and bake 15 minutes.
In a saucepan, combine pineapple, ½ cup sugar, and cornstarch. Cook over medium heat until thick and glossy. Remove from heat and stir in egg.
Spread pineapple mixture evenly over the crust.
Bake for 25–30 minutes until set. Cool completely before cutting. Chill for cleaner slices.
Notes
- Use crushed pineapple packed in juice, not syrup, for best flavor.
Line your pan with parchment for easy removal.
Let bars cool fully to avoid a runny filling.
Store in an airtight container in the fridge up to 5 days or freeze for longer storage.